
Student Academic Management (Teaching Managers)
Attendance, Evaluation & Reports Guide
Teaching Managers: Managing attendance and evaluation of students
ANGLO uses the name SAM for the documents that are used for Student Academic Management
The Student Academic Management (SAM) Google Sheet document brings together attendance, class profile, class records, progress checking and report generation to one place.
This guide explains how to use the SAM from an administrator’s perspective. TMs and WTS can interact with more parts of the SAM than teachers can.
To understand how your teachers need to complete the attendance, profile and evaluation information, please refer to the Student Academic Management Guide for Teachers.
🔎 Overview of the SAM document
There is a SAM Google Sheet for each group A and group B in each turn. These SAM documents are already in your Academic Shared Drive > Academic > Turn 1 (or Turn 2, 3, 4).
You can easily identify these documents from the title of the document, for example:🔴 Group A Turn 1 SAM
Or🟢 Group B Turn 2 SAM
Each of these documents has permissions so that everyone can edit it
Naturally, there are controls in place to make sure users don’t edit areas they shouldn’t.
🔀 Flow of the SAM document
- Set Up: Assigning Teachers to Groups
- Class Lists: Generating class lists
- Daily Use: Recording attendance & evaluating students
- Reports: Generating reports for each student
🤹🏽♂️ Set Up: Assigning Teachers to Groups
When you first open a SAM document you will land on the ‘⚙️ DASH’ sheet. Here is where you will see the various classes at your centre - each one denoted by a name - and the course level of each oneone:

In the example above, there are 73 concurrent classes.
Now you need to assign teachers to teach each class by entering their name in the relevant group's row in the Teacher column. You also need to enter the classroom assigned to that teacher.
The Number of Students, the Course Level and Age Range of each group are also shown to facilitate assigning the most appropriate teacher to the group:
That’s the end of the setup!
If you visit any of the class sheets at the bottom of the document e.g. ‘Bath’, you will see the teacher’s name and class level just as you assigned them on the ‘⚙️ DASH’.
The only thing that remains is to make sure your teachers have the link to the SAM document. You can send this via email or WhatsApp
Remind teachers that they will need to pay attention as they will have two parallel SAM documents; one for group A and one for group B.
Remind teachers to follow the information detailed in "Student Academic Management (Teachers)" which is linked on the Teaching Hub.
📃 Class Lists: Generating class lists for distribution
Once the setup is complete, and each group has been assigned a teacher and a classroom, the SAM can be used to generate a printable Class List for each class:
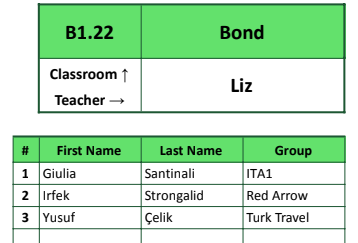
A PDF is created for each class. These can be printed and stuck on a noticeboard or wall, or shared digitally with Group Leaders. This is essential for students and group leaders to know where they must be for their classes.
To generate the class lists:
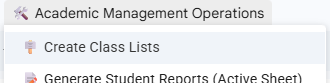
- Click Academic Management Operations > Create Class Lists at the top of the document

(If this is the first time you are using the menu, you will need to authorise the script) - A popup message will confirm the classes that a class list will be created for. It also informs you that the generated Class Lists will be stored in Google Drive and also emailed to you. If you are happy, press Yes to continue
- DO NOT PRESS ANYTHING ELSE. You will see a notification in the bottom right hand corner of the screen indicating progress
- When the operation finished you will see a success message
- You can find the Class Lists in your email inbox as well as in your Academic shared drive
🗓️ Daily Use: Recording attendance & evaluating students
Once the course begins and students are in the classrooms with their teachers, the regular daily use of the SAM document begins.
Teachers must record attendance, complete class profile, complete class records, and evaluate students. It is best to refer to Student Academic Management (Teachers) for further details.
📝 Reports: Generating reports for each student
Towards the end of each course, when all the attendance and evaluation* has been entered by the respective teachers, you are ready to generate reports for each class.
*For reports to be correctly generated, all basic student info (First Name, Last Name, Group, Nationality, ID) and Day 4 and Day 8 evaluation results must be entered
You need to generate reports class by class:
- Make sure the sheet for the class you want to generate reports for is active (click it to make it active)
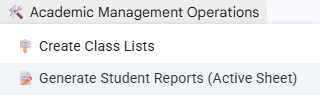
(the blue colour means it’s active) - Click the Academic Management Operations button at the top of the screen and select Generate Student Reports (Active Sheet):
(If this is the first time you are using the menu, you will need to authorise the script)
The system will do some checks to make sure that everything looks right. If there is something wrong, you will be informed by an error popup notice. Follow the instructions given in the popup message. If you are not able to, reach out to Chris. - Assuming there are no error popups, you will be greeted by a confirmation message. It’s important to read this message carefully!
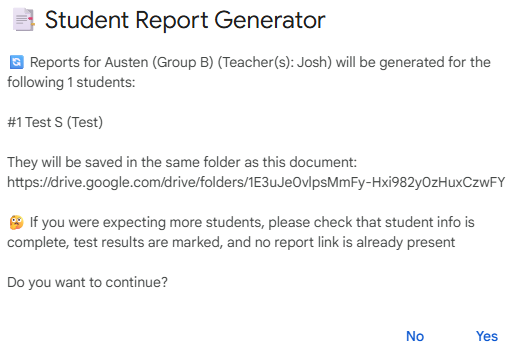
The folder location will be shown to you again at the end of the process. In any case the reports will be in the same location as the SAM, in Student Reports > Group B Reports (or A) > Austen (or other group name) -
If you are not happy and want to edit student information in the sheet, click ‘No’. Otherwise, click ‘Yes’.
⚠️ Once you have clicked "Yes", DO NOT CLICK anything else. Wait until you see a success message. -
You can copy the folder link and then paste it into another browser tab to see the reports.
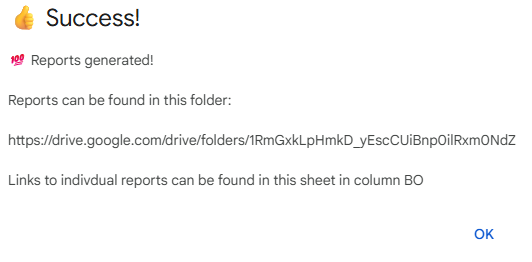
ℹ️ Each student's generated individual PDF report will be linked in the rightmost column for future reference
Inside the folder, each report has the name of the student, with the first letter of their surname and their group name as the file title
You should check all generated reports.
Liaise with the Programme Manage to arrange sending them to the group leader.


🔀 Moving a Student from one group to another
Carefully follow these steps:
➡️ If the course hasn’t started yet:
- Select the student’s information in columns B to I of the group sheet and press ‘Ctrl + C’ to copy (or click the ‘Edit’ button at the top, then click ‘Copy’)
- Navigate to the new group’s sheet
- Select the cell in column B where there is the first empty row and on your keyboard press, ‘Ctrl + Shift + V’ (or click the ‘Edit’ button at the top, then click ‘Paste without formatting’)
- Go back to the old group, select the student’s information in columns B to H, then press backspace on your keyboard to remove the student (since no attendance or profile data has been entered for this student, it is safe to delete them)
- If there are other students below the empty row and you wish to remove the empty row, select all their data with your mouse, then press ‘Ctrl + C’ to copy (or click the ‘Edit’ button at the top, then click ‘Copy’)
- Press backspace on your keyboard to delete the selected students
- Select the cell in column B where there is the first empty row and on your keyboard press, ‘Ctrl + Shift + V’ (or click the ‘Edit’ button at the top, then click ‘Paste without formatting’)
➡️ If the course has already started (meaning that some attendance for the student has been recorded):
- In the old group’s sheet, select the student’s information and any attendance, and press ‘Ctrl + C’ to copy it (don’t delete it!)
- Move to the new group’s sheet, and select the cell in column B where the first empty row is (i.e. after the last student) and press ‘Ctrl + Shift + V’ (or click the ‘Edit’ button at the top, then click ‘Paste without formatting’)
- Repeat steps 1 and 2, except this time copying the student’s Class Profile information from the old group to the new group (if it was filled out)
- IMPORTANT: Return to the old group’s sheet and modify the student’s departure date to the new departure date (likely today). The easiest way to do this is to double click the cell, and select a date from the picker
- IMPORTANT: Now select the student’s Nationality, Age and Level. Delete them. You can now see the departed student’s row has turned red, indicating to the teacher that the student is no longer in the class. They are also not counted among the total number of students
🆘 Help! (FAQs)
Q: What happens when you click the 'Academic Management Operations' button for the first time?
IMPORTANT: The first time you press this button and Create Class Lists or Generate Student Reports you will need to to give authorisation for the script to allow access to Sheets and Drive. This is safe to do. Authorise the script by following the instructions on screen.
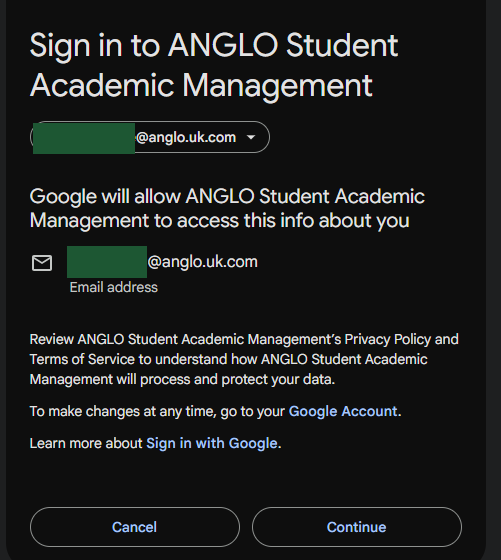
When you see the message:

Click Continue (after making sure the account you are logged into is your ANGLO Google Workspace account):
Select all to give the script the necesary permissions:

Press Continue and the popup window will disappear.
You now need to go back and click the Academic Management Operations button again to perform the process you wanted.
Q: I have generated some reports and I’ve discovered there’s some missing information that I would like to add (or information I would like to change). How do I go about regenerating the reports?
A: If you discover any mistakes, correct them in the class sheet. Then delete the Report link in the rightmost column for the student(s) you would like to regenerate reports for. Finally, run the Generate Student Reports again via the button at the top. (Pro tip: You may wish to move or rename the old PDF reports in Google Drive first)